- If you’ve ever wondered how to make ice cream with an ice cream maker, you’re in the right place! Making your own ice cream at home is not only fun, but it also allows you to customize flavors and ingredients to suit your taste. With an ice cream maker, you can easily churn out creamy, delicious ice cream in just a few simple steps.
- In this guide, we’ll walk you through everything you need to know to make the perfect batch of homemade ice cream using your ice cream maker. Let’s get started!
Click Here : Best Ice Cream Maker Machines Under ₹5,000 in India: Top Picks for 2025
What is an Ice Cream Maker?
An ice cream maker is a kitchen appliance designed to freeze and churn an ice cream base into a creamy frozen dessert. It works by mixing the ingredients while simultaneously freezing the mixture, which helps incorporate air into the ice cream and gives it that smooth, creamy texture.
There are different types of ice cream makers, each with varying features and functionalities. The most common types are:
- Electric Ice Cream Makers: These machines come with a built-in motor and compressor, meaning they can churn and freeze your ice cream mixture automatically without needing to pre-chill the base.
- Frozen Bowl Ice Cream Makers: These machines require you to freeze the bowl ahead of time. The frozen bowl helps freeze the mixture as it churns.
- Manual Ice Cream Makers: Traditional hand-cranked machines require manual effort to churn the ice cream, making them a fun choice for families or small gatherings.

The Basics of Making Ice Cream with an Ice Cream Maker
To make delicious ice cream with an ice cream maker, you’ll need a few key ingredients and some patience. The process involves preparing the base, chilling it, and then churning it in the ice cream maker.
Let’s walk through the steps:
Ingredients for Homemade Ice Cream
Here’s a simple, classic vanilla ice cream recipe to get you started. You can adjust the base to create different flavors later.
- 2 cups heavy cream
- 1 cup whole milk
- 3/4 cup granulated sugar
- 1 tablespoon vanilla extract
This recipe yields about 4 servings of vanilla ice cream, which is perfect for a small batch. If you want to make a larger batch, just scale up the ingredients accordingly.
Step 1: Prepare the Ice Cream Base
- Start by preparing your ice cream base. In a mixing bowl, whisk together the heavy cream, whole milk, sugar, and vanilla extract until the sugar is completely dissolved. If you want to experiment with different flavors, this is the time to add ingredients like cocoa powder for chocolate, or crushed fruit for fruity flavors. The key is to make sure the mixture is smooth and homogeneous.
- Pro Tip: If you want a richer flavor, you can use more cream and less milk. For a lighter version, reduce the cream and add more milk.
Step 2: Chill the Base
- Once your base is ready, it’s crucial to chill it in the refrigerator for at least 30 minutes. This helps the mixture freeze more evenly and contributes to a smoother, creamier texture in the final product. Chilling also helps the flavors to meld together, enhancing the overall taste.
Step 3: Prepare Your Ice Cream Maker
- While the base is chilling, you should prepare your ice cream maker. If you’re using a frozen bowl ice cream maker, make sure the bowl has been in the freezer for at least 12-24 hours prior to using it. The freezing liquid inside the bowl needs enough time to reach the proper temperature.
- For electric ice cream makers with compressors, you can skip this step since the machine freezes the mixture as it churns. Just make sure the machine is set up according to the manufacturer’s instructions.
Step 4: Pour the Base into the Ice Cream Maker
- Once the ice cream base has been chilled, pour it into the prepared ice cream maker’s bowl. Make sure not to overfill the bowl. It’s important to leave some space for the mixture to expand as it churns.
Step 5: Churn the Ice Cream
- Now it’s time for the machine to do its magic. Turn on your ice cream maker and let it churn the mixture. Churning typically takes anywhere from 20 to 40 minutes, depending on the type of machine you are using. During this process, the mixture will thicken and freeze, gradually turning into a smooth, creamy ice cream.
- Pro Tip: For a softer consistency (like soft serve), you can enjoy the ice cream as soon as it’s done churning. For firmer ice cream, transfer it to a container and place it in the freezer for 2-4 hours to harden.
Step 6: Add Mix-ins (Optional)
- If you’d like to add mix-ins such as chocolate chips, nuts, or fruit, do so during the last 5-10 minutes of churning. This ensures that the mix-ins are evenly distributed without being over-processed. Adding them at this stage prevents them from breaking down too much.
Step 7: Freeze and Serve
- After the ice cream has finished churning, it will likely have a soft-serve consistency. If you prefer firmer ice cream, transfer it to an airtight container and place it in the freezer for an additional 2-4 hours. When you’re ready to serve, scoop it into bowls or cones, and enjoy your homemade creation!
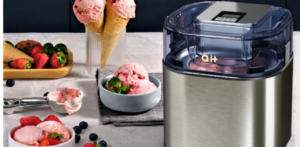
Kitchenif Digital Ice Cream Sorbet Slush & Frozen Yoghurt Maker (1.5 Ltr), White
- AUTOMATIC DIGITAL OPERATION
- EAT FRESH & HEALTHY
- MODERN DESIGN With LARGE 1.5 Liters Capacity
- 2 YEAR WARRANTY
- INTERNATIONAL DURABLE QUALITY
Tips for Perfect Ice Cream Every Time
1. Use High-Quality Ingredients
- The flavor of your ice cream is only as good as the ingredients you use. Choose fresh, high-quality cream, milk, and vanilla extract for the best taste.
2. Chill the Base Thoroughly
- Don’t skip the chilling step. A cold mixture churns better and freezes more evenly, resulting in a creamier, smoother texture.
3. Don’t Overfill the Ice Cream Maker
- Leaving some space in the bowl allows the ice cream to expand and churn properly. Overfilling can lead to messy spills and uneven churning.
4. Experiment with Flavors
- Once you’re comfortable making basic ice cream, start experimenting with different flavors and mix-ins. Add caramel, peanut butter, or fruit to create your own signature ice cream flavors.
5. Proper Storage
- After you’ve made your ice cream, store it in an airtight container in the freezer to keep it fresh. Let it sit at room temperature for a few minutes before serving if it gets too hard to scoop.
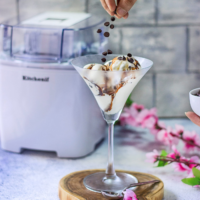
CUISINART Conair ICE-21 1.5 Quart Frozen Yogurt – Ice Cream Maker

- SUPERIOR FUNCTION
- COOL FEATURE
- CAPACITY: Makes up to 1-½-quarts
- EASY TO USE
- 3-YEAR WARRANTY
Final Thoughts
- Making ice cream with an ice cream maker is a fun and rewarding way to enjoy delicious, homemade desserts. With just a few simple ingredients and the right equipment, you can create creamy, flavorful ice cream in the comfort of your own kitchen. Whether you stick with a classic flavor like vanilla or experiment with more creative variations, the possibilities are endless.
- By following the steps outlined in this guide, you can master the art of making ice cream and enjoy the satisfaction of creating your own frozen treats. Remember to use high-quality ingredients, chill your base properly, and allow the ice cream to churn until it reaches the perfect consistency. With practice, you’ll be able to customize your ice cream to suit your tastes, making every batch unique and delicious.
- So, what are you waiting for? Grab your ice cream maker, get your ingredients ready, and start making your own homemade ice cream today. Your taste buds will thank you!
Table of Contents
FAQs
1. Do I need to pre-freeze the bowl for my ice cream maker?
- For frozen bowl ice cream makers, yes, the bowl needs to be pre-frozen for at least 12-24 hours before use. This ensures it’s cold enough to freeze the ice cream mixture as it churns. However, electric ice cream makers with built-in compressors don’t require pre-freezing.
2. Can I use low-fat milk or non-dairy alternatives for making ice cream?
- Yes! You can substitute low-fat milk, almond milk, coconut milk, or other non-dairy alternatives. Keep in mind that using non-dairy or lower-fat options may result in a slightly different texture, but the ice cream will still be delicious.
3. How long does it take to make ice cream with an ice cream maker?
- The churning process typically takes between 20-40 minutes, depending on your machine. After churning, you can serve the ice cream immediately for a soft-serve consistency, or freeze it for 2-4 hours for a firmer texture.
4. Can I add mix-ins like chocolate chips or fruit to the ice cream?
- Absolutely! Add mix-ins during the last 5-10 minutes of churning to ensure they are evenly distributed without getting too broken down. Chocolate chips, nuts, fruits, and candies are all great options.
5. How do I store homemade ice cream?
- To store homemade ice cream, transfer it into an airtight container and place it in the freezer. Allow it to sit for a few minutes at room temperature before serving, as homemade ice cream can become quite firm after freezing.